Tyk Streams Quick Start
Last updated: 3 minutes read.
In this guide, you’ll learn how to set up Tyk Streams and configure your first asynchronous API. By the end of this guide, you will have a fully functional API that allows you to subscribe to a WebSocket and see the messages you post to Tyk (REST) in real-time.
Let’s get started and unlock the power of Tyk for your asynchronous API needs!
Prerequisites
To get started with Tyk Streams, you will need:
- Docker installed on your machine
- A WebSocket testing tool like wscat for testing your async APIs
Install Tyk Streams Demo
The tyk-pro-docker-demo repository provides a docker compose environment that can be run locally to try out Tyk streams.
Download
Clone the tyk-pro-docker-demo repository using git or the GitHub CLI command:
git
Issue the following git command to download the Tyk streams demo:
git clone https://github.com/TykTechnologies/tyk-pro-docker-demo
GitHub CLI
Issue the following Github CLI command to download the Tyk streams demo:
gh repo clone TykTechnologies/tyk-pro-docker-demo
Configure the installation
Once downloaded, create and save a .env file with your Tyk Dashboard license key and configure the demo to use the Tyk Streams docker images:
DASH_LICENSE=<paste_your_license_here>
GATEWAY_VERSION="v5.5.0-alpha2"
DASHBOARD_VERSION="s5.5.0-alpha1"
PORTAL_VERSION="v1.10.0-alpha2"
Additionally add the following line to confs/tyk.env:
TYK_GW_LABS='{"streaming":{"enabled": true}}'
And similar to confs/tyk_analytics.env:
TYK_DB_LABS='{"streaming":{"enabled": true}}'
Start Demo
Start the Tyk Streams demo by issuing the following command:
./up.sh
- Open Tyk Dashboard in your browser by visiting http://localhost:3000 and login with the provided credentials.
Configuring a Basic Async API
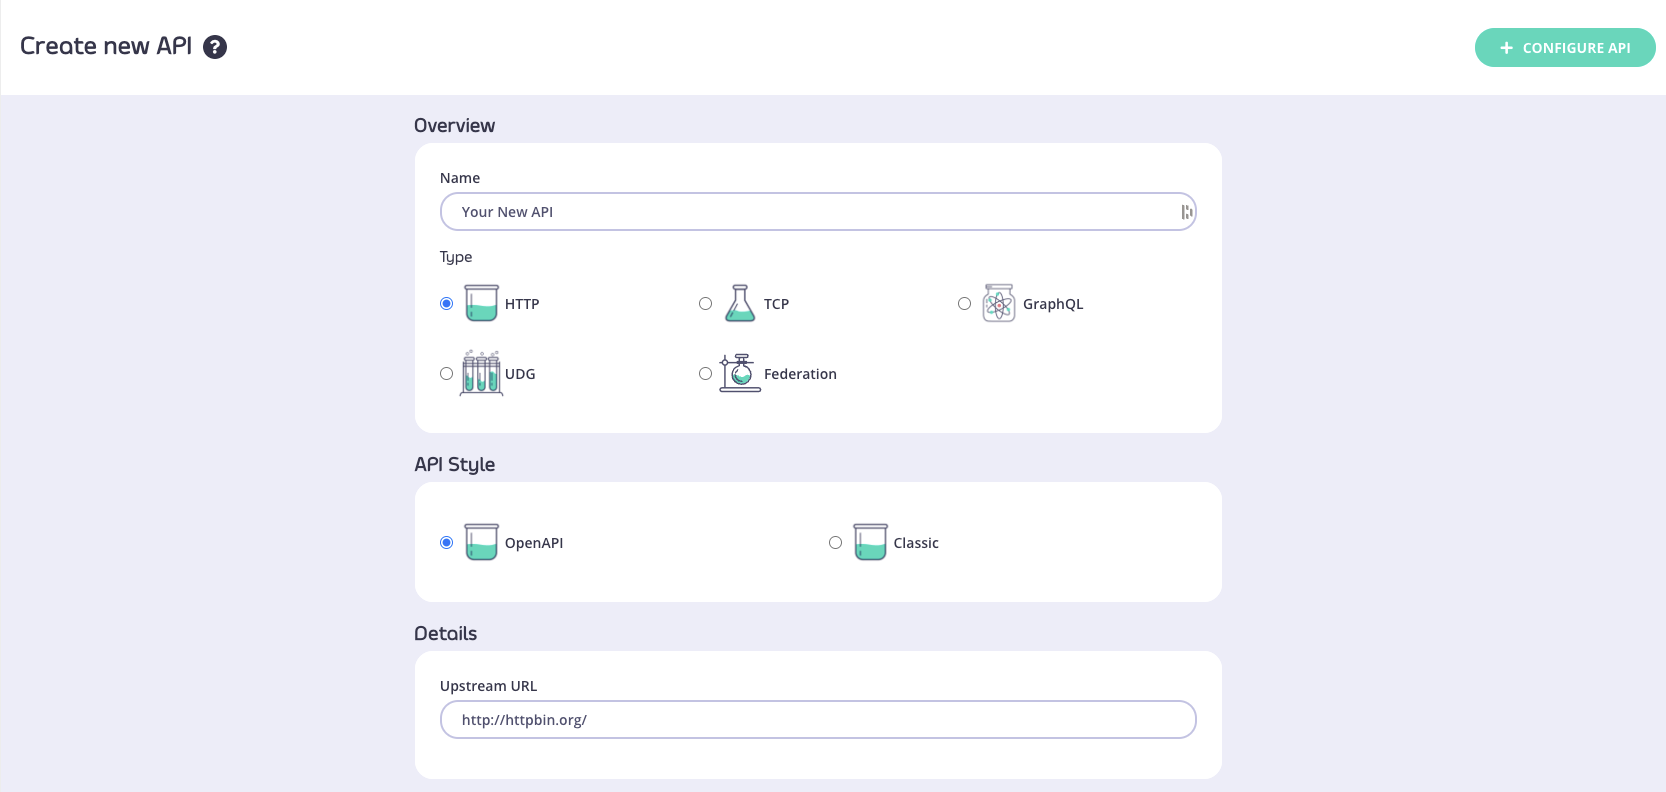
In the Tyk Dashboard, create a new API. Click the +CONFIGURE API button to continue.

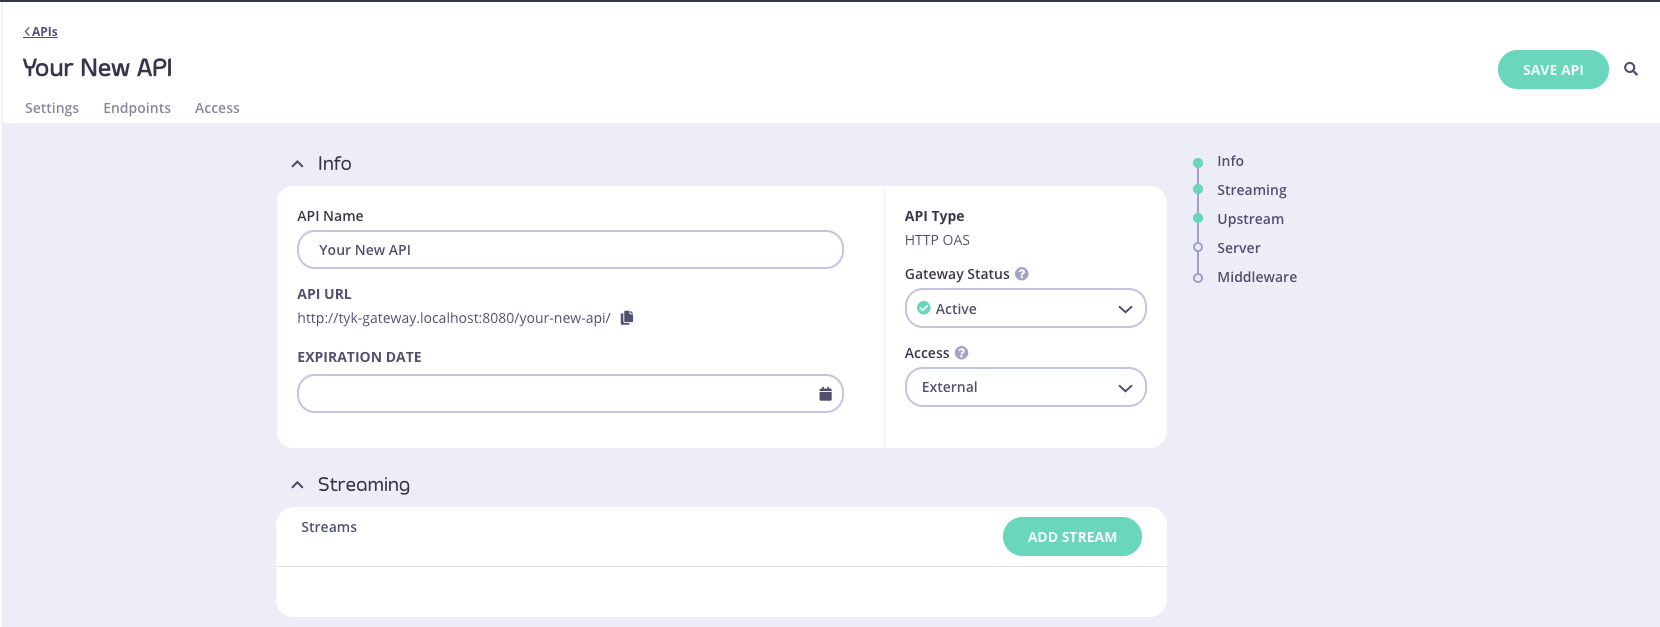
Select Active from the Gateway Status drop-down list and then select External from the Access drop-down list.
Note: For this example, the Upstream URL will not be used, as the streaming server will handle the requests and responses directly. However, a value is still needed to comply with the API definition schema.
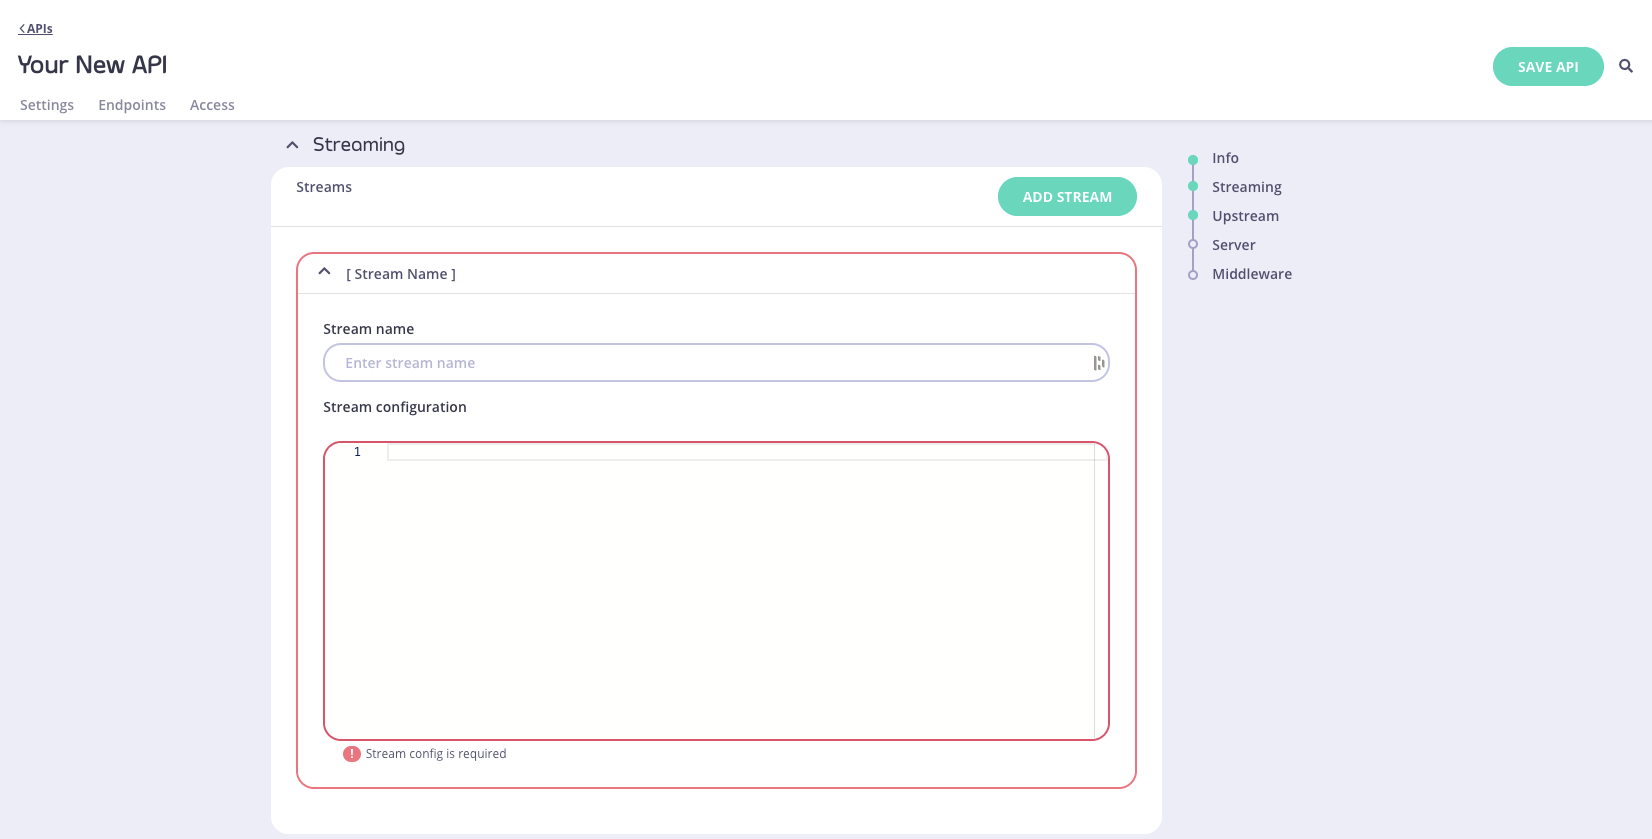
Navigate to the Streaming section and click on Add Stream.

Provide a name for your stream in the Stream name textbox

In the Stream configuration, define your stream input and output:
input:
  http_server:
    path: /post
  label: example_generator_input
output:
  http_server:
    ws_path: /subscribe
  label: example_websocket_output
In the above configuration it can be seen that:
- Messages can be posted to the
/<listen-path>/postendpoint - Clients can subscribe to messages via WebSocket at the
/<listen-path>/subscribeendpoint
Save your API definition.
Testing Your Async API
Lets test the async API we just created.
- Subscribe to the WebSocket using wscat:
wscat -c ws://localhost:8080/<listen-path>/subscribe
- Post a message to the
/postendpoint using curl:
curl -X POST -d '{"message":"Hello, Tyk Streams!"}' http://localhost:8080/<listen-path>/post
- Verify that the message posted in step 1 is received in the wscat terminal.

Debugging
If you encounter issues, here are a few things to check:
- Ensure all Docker containers are running correctly
- In case you used this repo before, ensure all Docker images are as defined in the example env above.
- Verify the API definition is properly configured in the Tyk Dashboard
- Check the Tyk Gateway logs for any error messages. Most of the time it’ll be syntax errors in the stream configuration. In such case, you might see 404 since the API definition has not been created in Tyk
Since Tyk Streams is currently released as a Lab Release, if a crash or an issue is encountered then Tyk Gateway can be restarted and the logs can be inspected as follows:
docker compose restart tyk-gateway
docker compose logs tyk-gateway -f
Next Steps
With this getting started guide, you have successfully set up Tyk Streams and created your first async API! You can now start exploring more advanced configurations and use cases.